
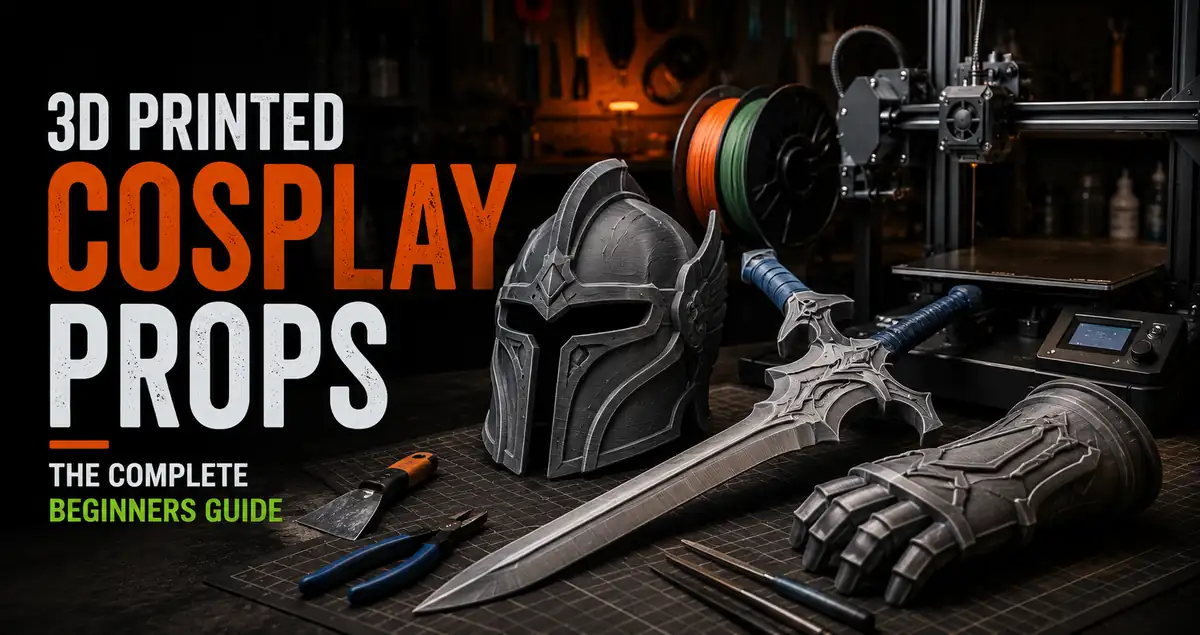
3D printing has become one of the most practical tools in a cosplayer’s workshop. It produces accurate, repeatable props at a cost and speed that foam and resin can’t match for complex geometry. If you’re new to prop printing or just combining 3D printing with cosplay for the first time, this guide covers everything: the right printer, the right filament, the workflow, assembly techniques, paint methods, and the decisions that separate a prop that looks good in photos from one that holds up through a full con day.
Why 3D Printing Works for Cosplay Props
Foam is fast and lightweight. Resin captures fine detail. Worbla is flexible and heat-formable. All of them have a place in prop making. 3D printing has a specific advantage the others don’t: repeatability and geometric precision.
If your character’s weapon has repeating elements (chain links, gear teeth, identical panel sections), symmetrical structures, or interlocking mechanical parts, 3D printing produces them identically every time. You design or download the file once, print as many copies as you need, and each one is exact. That consistency is what you’re paying for in time and filament.
The other advantage is accessibility to complex internal geometry. A prop handle with a hollow interior, integrated clips, and locking tabs that fold together would be extremely difficult in foam. In FDM with a well-designed file, it prints cleanly in one or two pieces.
In South Florida’s con scene — MegaCon Orlando, Supercon Miami, Holiday Matsuri, Tampa Bay Comic Con — the volume of 3D printed props at events has grown substantially. The combination of affordable Bambu Lab printers and prop-specific STL files has made convention-quality prop printing accessible to cosplayers who aren’t dedicated fabricators.
What You Need to Get Started
The minimum practical setup for cosplay prop printing:
FDM printer. Any reliable modern FDM machine handles most prop work. Bambu Lab A1 Mini ($299) for smaller props and accessories. Bambu Lab A1 ($370) for full-size props. Speed is a real advantage for convention deadlines: a Bambu Lab at 200-300mm/s practical print speed runs a prop section in half the time an older 60mm/s machine would. For large armor pieces and helmets over 250mm, the Bambu Lab H2S (340mm build volume) removes the need to split those prints. See the full breakdown at the OreKo FDM printers guide.
Matte PLA filament. Matte PLA is the default for painted props because its textured surface grips primer and paint without sanding. Standard shiny PLA requires surface prep before paint adheres properly. A 1kg spool ($15-$25) covers a significant amount of prop work. For South Florida outdoor events or car storage, use PETG for structural prop pieces. More detail in the full cosplay filament guide.
Basic post-processing tools. Flush cutters, sandpaper (120 and 220 grit), filler primer spray, and acrylic paints. You likely own most of this if you do any crafting. Add CA glue (thin Loctite) and accelerator for clean part assembly.
Prop-specific STL files. Files designed for cosplay are built around FDM constraints: no supports, logical print orientation, parts sized to fit standard build plates, keyed joints for alignment. Buying from a dedicated creator is worth it for the time saved over adapting a generic game asset.
Prop Categories and How to Approach Each
Weapons and Melee Props
Swords, staffs, maces, hammers. These are the most common printed prop category and the most demanding structurally. Long thin weapons flex and can snap if printed without enough internal support from walls and infill.
Key design considerations: Long thin props (swords, staffs) need a central channel for a fiberglass or carbon fiber rod core. The rod takes the bending load; the PLA shell provides the surface detail. Without a core, a 900mm sword in PLA will flex noticeably and can break at the handle under con conditions. Cores are typically 6mm or 10mm fiberglass rod, threaded through a printed channel before the handle section is assembled.
For shorter weapons (daggers, axes, maces under 300mm), solid or semi-solid construction at 3-4 walls and 20% infill usually provides enough rigidity.
Armor Panels and Body Pieces
Chestplates, pauldrons, gauntlets, greaves. These need to be lightweight for wearability and durable for handling.
Key design considerations: Large flat armor panels are where you most aggressively optimize for weight. 2 walls and 10% infill on a large flat panel is often sufficient — the geometry provides structural rigidity and the print doesn’t need to resist point loads. Attachment points (where you bolt or strap the armor to the garment) need to be reinforced, either with local infill modifiers or embedded hardware.
For South Florida conventions: large armor panels in direct sun face real heat risk with PLA. Either print structural armor in PETG or plan your convention day to stay in air-conditioned areas.
Accessories and Props
Badges, insignia, belts, pouches, tactical gear accessories. These are the easiest category and often the most rewarding for first-time prop printers because the results are immediate and the margin for error is forgiving.
Good entry points: the OreKo Lollipop Chainsaw chain links print flat, assemble without glue, and produce a working articulating prop chain without any complex printing or assembly. Each link prints in under 15 minutes. A full chain takes an afternoon.
Helmets
The most technically demanding prop category. Full helmets exceed most standard printer build volumes and require careful part splitting, head sizing, and ventilation planning.
Key design considerations: Helmets need to be sized for the wearer’s head, not the character’s proportions (which are often stylized). Measure head circumference before downloading any helmet file and confirm the file’s documented interior dimensions. A prop that looks right in the render might be 15% too small for an average adult head.
Helmets typically split into half-shells (front and back) or multiple sections. The seam location matters: seams at the center-back are less visible than seams at the temples. Seams need to be sanded smooth and filled before priming.
The Complete Workflow: File to Convention-Ready Prop
Step 1: File acquisition and verification. Download your files. Print a small test section or single piece at 50% scale first. Check for gaps, unexpected geometry, and whether the support requirement matches the description. 15 minutes of testing saves hours of failed full prints.
Step 2: Slicer settings. Default settings for most prop work: 0.2mm layer height, 3 walls, 15-20% gyroid infill. Detail pieces (badges, engravings, small accessories): 0.12mm. Large structural flat panels: 0.28mm to reduce print time with acceptable surface quality. Enable brim on tall narrow parts to prevent warping.
Step 3: Print and monitor. Watch the first layer. Check the first few millimeters of a print on complex props before walking away. Most print failures show up in the first 10% of the print.
Step 4: Assembly. Use flush cutters to clean print lines off mating surfaces. Test dry-fit before applying any adhesive. Thin CA glue (Loctite Ultra Gel or Super Glue 3) on PLA-to-PLA joints with accelerator spray produces a rigid bond in seconds. For structural joints on large props, consider drilling and pinning with 2mm steel or fiberglass pins for additional mechanical reinforcement.
Step 5: Surface prep. Fill any visible seams with hobby filler or CA glue. Sand filled areas with 120 then 220 grit. On matte PLA, this prep is minimal. Wipe with IPA before priming.
Step 6: Prime. Two light coats of filler primer (Rust-Oleum 2-in-1 Filler + Primer works well on PLA). Sand lightly with 400 grit between coats for a smooth final primer surface. On matte PLA, one coat often suffices.
Step 7: Paint. Acrylics (Vallejo, Citadel, Liquitex) for detail and hand work. Spray paint for base coats and large coverage areas. Metallic spray paint for metal-effect base coats before hand-detail weathering.
Step 8: Seal. Spray or brush-on clear coat. Matte varnish for battle-worn effects. Satin for most armor and weapon finishes. Gloss for polished surfaces and gems. In Florida’s high humidity, use brush-on varnish during summer months — spray clear coat applied in humidity above 70% can blush (turn milky white).
Multi-Part Assembly Techniques
Most large props split into multiple printed pieces. How you join them matters for both strength and appearance.
Alignment pins. Drill matching holes in mating surfaces and insert short sections of filament or steel rod as alignment pins before gluing. This ensures parts mate precisely and the joint doesn’t shift while the glue cures. 1.75mm filament works perfectly as a pin in a 1.8mm hole on PLA.
Keyed joints. Well-designed prop files have interlocking keys or tabs built into the mating surfaces. These are like large puzzle teeth that align parts automatically and increase the glue surface area. If a file doesn’t have them, you can design a simple key in TinkerCAD and print it as a separate insert.
Mechanical fasteners. For joints that need to be disassembled (for transport, or for props that need to be broken down for airline travel), threaded inserts (brass M3 heat-set inserts pressed into printed holes) accept machine screws cleanly and create a durable removable joint.
Magnetic closures. For helmet splits and removable armor panels, small N52 neodymium magnets (6mm x 2mm disc magnets) embedded in printed recesses create clean closures with no visible hardware. Print a recess that fits the magnet, press the magnet in, and the joint snaps closed cleanly. Plan the polarity before printing both sides.
LED Integration in Printed Props
LEDs add a dimension to 3D printed props that foam and most other materials can’t provide easily. Common approaches:
Translucent filament. Gemstones, power crystals, glowing orbs, and light-up elements are printed in natural or translucent colored PLA/PETG with a recess for an LED or small LED strip behind the piece. The light difuses through the translucent material and produces a convincing glow effect. PETG at 15% gyroid infill transmits light through the infill pattern, creating an interesting texture effect at the right brightness.
LED channels. Swords, staffs, and wands can have a central channel designed to accept a flexible LED strip. The strip runs the length of the prop and is connected to a small battery pack concealed in the handle. Light leaks through translucent printed tip pieces.
Diffuser prints. A thin-walled shell (1-2 walls, no infill) in white or natural PLA over an LED source creates a clean diffused glow. Prints in any color that has some light transmission. Wall thickness controls how much light passes through.
Battery placement. Design battery access from the beginning. A 3xAAA battery holder fits inside most prop handles. A USB-C rechargeable 18650 battery fits in most large prop bodies with a printed battery bay that opens for charging.
What Makes a Good Cosplay Prop STL File
| Well-Designed Prop File | Generic 3D Model Adapted for Printing |
|---|---|
| No supports needed, or minimal easy-to-remove supports in documented locations | Heavy supports that damage surface finish and require extensive cleanup |
| Split into parts sized for a standard 256mm print bed | Single large piece or splits that don’t fit standard machines |
| Parts have alignment pins or keyed joints built in | Flat mating surfaces that require measuring and careful alignment |
| Surface detail scaled for 0.2mm layer height on a 0.4mm nozzle | Detail at a scale FDM cannot reproduce; looks blurred in print |
| Documented with layer height, wall count, filament type, and print time estimates | No print guidance; trial and error for settings |
| Real print photos in the listing, not just renders | Renders only; actual print quality unknown |
Common Beginner Mistakes
Printing at 0.3mm layer height to save time. The time savings are real but surface quality suffers noticeably. 0.3mm layer lines are visible and require heavy sanding. For most prop surfaces, 0.2mm is the right balance. Only go coarser on large structural pieces that will be fully painted and where surface texture doesn’t read on the finished prop.
Skipping primer. Paint applied directly to unprimed PLA (especially shiny PLA) peels and looks uneven. Filler primer is a 10-minute step that makes every subsequent paint step easier and the final result significantly more durable.
Printing the full prop immediately. Print one part or a scale test before running the full set. A 30-minute test print that reveals a fit issue saves hours of reprinting.
Default wall count (2 walls). For props, use 3-4 walls. Props are handled, dropped, and transported. Two walls is adequate for a display piece sitting on a shelf. Three to four walls is appropriate for anything you’re actually wearing or carrying at a convention.
Not accounting for finishing time. A prop that prints in 8 hours needs 4-8 hours of finishing. Build that into your con schedule. The prop that looks rushed at a convention was usually rushed in the finishing phase, not the printing phase.
Ignoring South Florida heat. PLA props left in a car in Florida summer will warp. Print critical prop pieces in PETG, or don’t leave PLA in a hot vehicle between the hotel and the venue.
Frequently Asked Questions: 3D Printed Cosplay Props
What is the best 3D printer for cosplay props?
For most prop work, a Bambu Lab A1 or A1 Mini. Speed matters at convention deadlines. The A1’s 256mm build volume handles most prop sections in one piece. For large helmets and armor, the P2S or H2S provides the build volume to minimize splits. See the best printers for cosplay guide for a full comparison.
What filament is best for cosplay props?
Matte PLA for painted props — it grips primer without sanding. PETG for structural pieces that will be worn outdoors, transported in cars in warm climates, or need flex resistance. TPU for straps, connectors, and flexible prop joints. Standard PLA works for indoor-only display props.
How long does it take to print a cosplay prop?
A single accessory: 1-3 hours. A full weapon prop: 8-20 hours total print time across multiple pieces. A helmet: 15-25 hours. Add 4-8 hours of finishing per prop. Start at least a week before your event for any prop with multiple pieces.
Do 3D printed props need supports?
Well-designed prop files are support-free by design. If a prop file requires extensive supports, look for a better version. Supports leave marks on surface finishes that add cleanup work and often don’t come off cleanly on complex prop geometries.
Is 3D printing better than foam for cosplay?
Different tools for different applications. 3D printing excels at hard props with repeating geometry, mechanical details, and complex internal features. Foam excels at large curved body armor, soft pieces, and anything needing impact protection when worn. Most complete costumes use both.
How do I make 3D printed props look more realistic?
Four steps: (1) Use matte filament rather than shiny. (2) Apply filler primer and sand between coats. (3) Use washes (thinned dark paint in recesses) and dry brushing (light metallic on raised edges) to add depth. (4) Seal with the right varnish sheen for the material (matte for aged metal, satin for armor, gloss for gems). The difference between steps 1-2 and all four is significant.
Can I attach LEDs to a 3D printed prop?
Yes, and it’s one of the strongest advantages of 3D printing over foam for props. Design battery recesses and LED channels into the model, or use translucent filament over LED sources for diffused glow effects. Most prop handles and bodies have enough interior space for a small battery pack.
What glue works on 3D printed props?
Thin CA glue (super glue) with accelerator for rigid PLA-to-PLA bonds. Two-part epoxy for high-stress joints. For any joint that needs to handle physical stress at a convention (handle junctions, heavy prop joins), reinforce with alignment pins or embedded fiberglass rod in addition to adhesive.